Lejos installation
Requirements:
Standard Lego Software
To run leJOS EV3 on your computer will need the USB driver for EV3. The easiest way to get it is to install the complete EV3 Developer Software. This is LEGO’s own software based on LabView. It is a graphical programming language and we will NOT be using it. We only need the USB driver that comes with it. You can get the software form the following link: https://www.lego.com/en-us/mindstorms/downloads/download-software Download and install the driver using all the default options.
Java
Visit http://www.oracle.com/technetwork/java/javase/downloads/java-archive-downloads-javase7-521261.html to download the version 7 of Java. You will need the JDK version. Oracle did already release version 8 of Java, but not yet for the EV3 brick. To build a proper Java project you need to build it for version 1.7. The catch is that the latest version of Eclipse requires Java version 8, which we will download and install next. You can have multiple version of Java installed on your computer without any problems.
If you don't already have Java 8 (1.8) installed you can get it from here and install it: http://www.oracle.com/technetwork/java/javase/downloads/index.html
Note: Oracle might ask you to login with a free Oracle account to download older versions of Java, so you might need to create one.
leJOS
The heart of any EV3 Java project is LeJOS. Visit https://sourceforge.net/projects/ev3.lejos.p/files to download the latest version of LeJOS. Once the download is complete run the file. Chose JDK 1.7 as the development kit for leJOS EV3, as it is the recommended version for this release, and remember the installation location (step 3 in the install) for later on for the eclipse configuration.
Eclipse
The Eclipse Integrated Development Environment (IDE) is a great software editor for your Java projects. It is free and open source. The latest version of Eclipse can be downloaded from here: https://www.eclipse.org/downloads/ You will need to configure Eclipse to compile with the right Java version and install the EV3 Plugin from Marketplace. Instructions on how to do that can be found in the installation pdfs linked on this page.
Install leJOS on your EV3 brick
The next step is to install LeJOS onto your EV3 brick. You do no need to replace the original firmware, since LeJOS will be copied to a Micro SD card. Once the card is in the slot and the brick boots up it will automatically start LeJOS. If you remove the card and reboot you will be back to the original firmware. The Micro SD card that you were given has all the required files on it, but the first time you will turn on the robot it will take a while to boot up since it needs to install leJOS on your brick. Instructions on how to create a leJOS Micro SD card image are linked on this page. You will also need to download the Java Runtime Environment (JRE) for LEGO Mindstorms from here : http://java.com/legomindstorms
Writing, Compiling, & Uploading Programs
Hello World Example
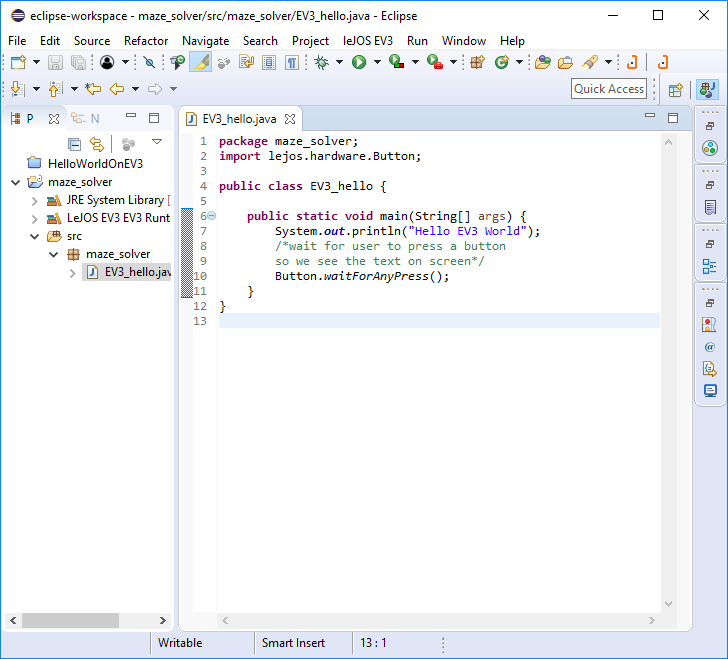
Here is a simple HelloWorld.java that prints Hello EV3 World to the EV3 screen.
import lejos.hardware.Button;

public class HelloWorld {

	public static void main(String() args) {
		System.out.println("Hello EV3 World");
 		Button.waitForAnyPress();

	}
}
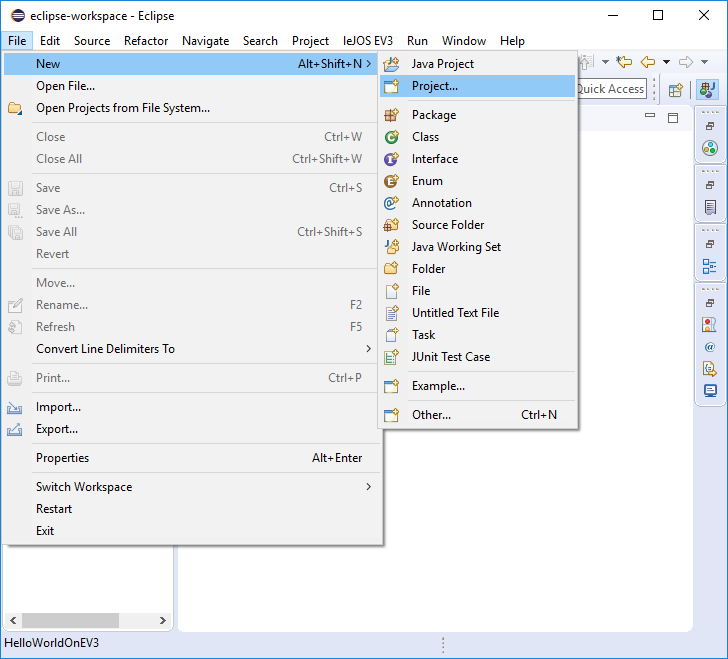
1. Open Eclipse and create a new project
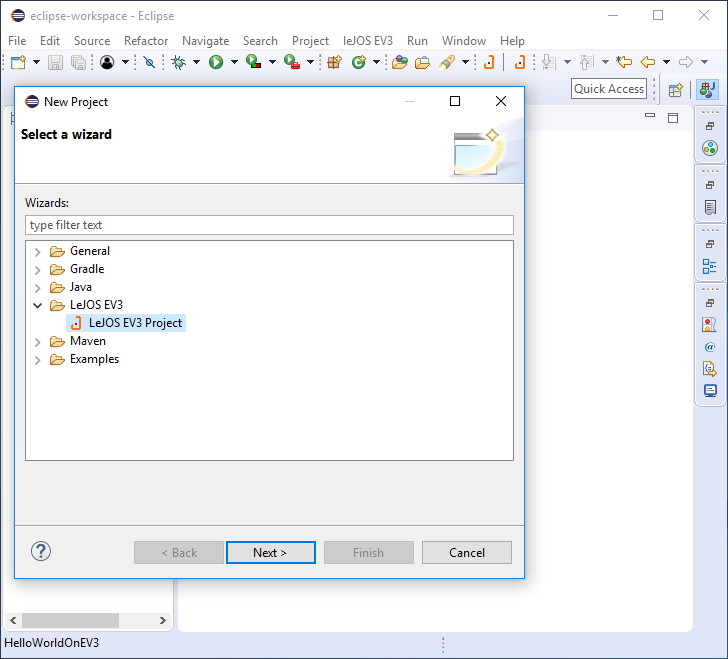
2. Select LeJOS EV3 Project
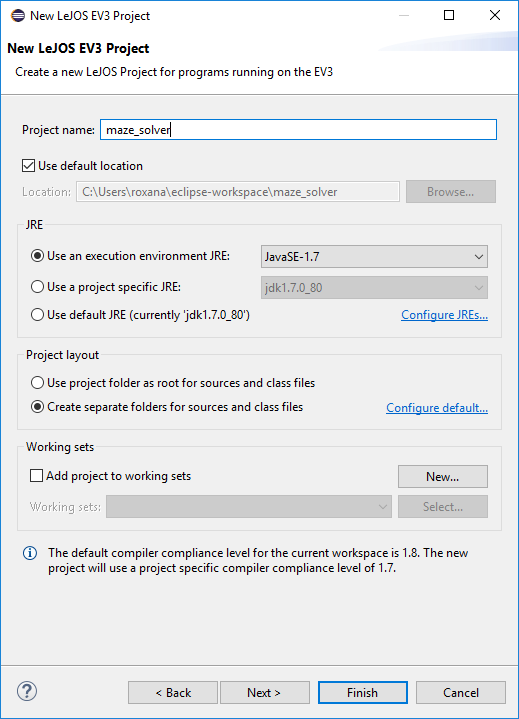
3. Give your project a name and make sure Java 1.7 is selected for the execution environment
4. Create a new class
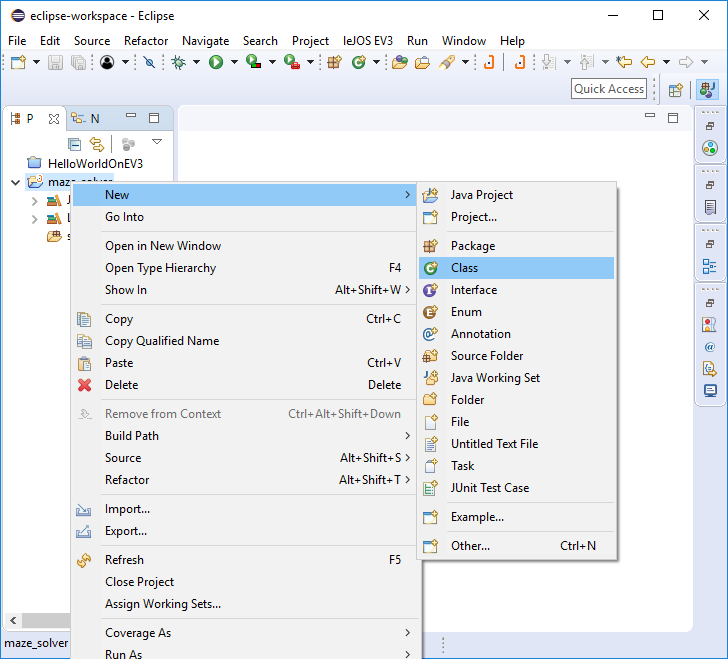
5. Name your class
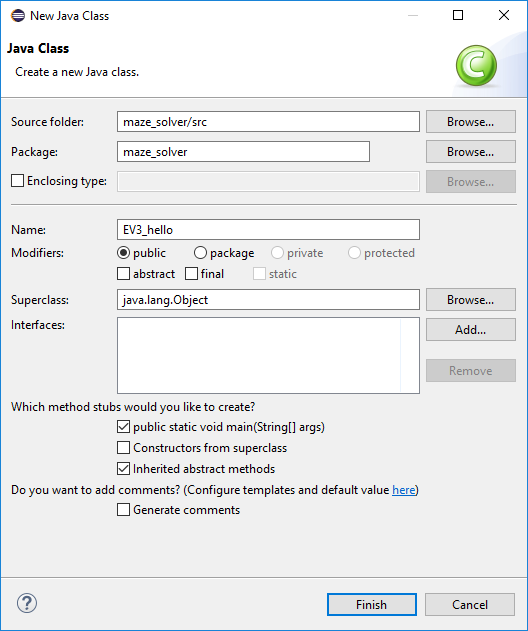
Add the desired code
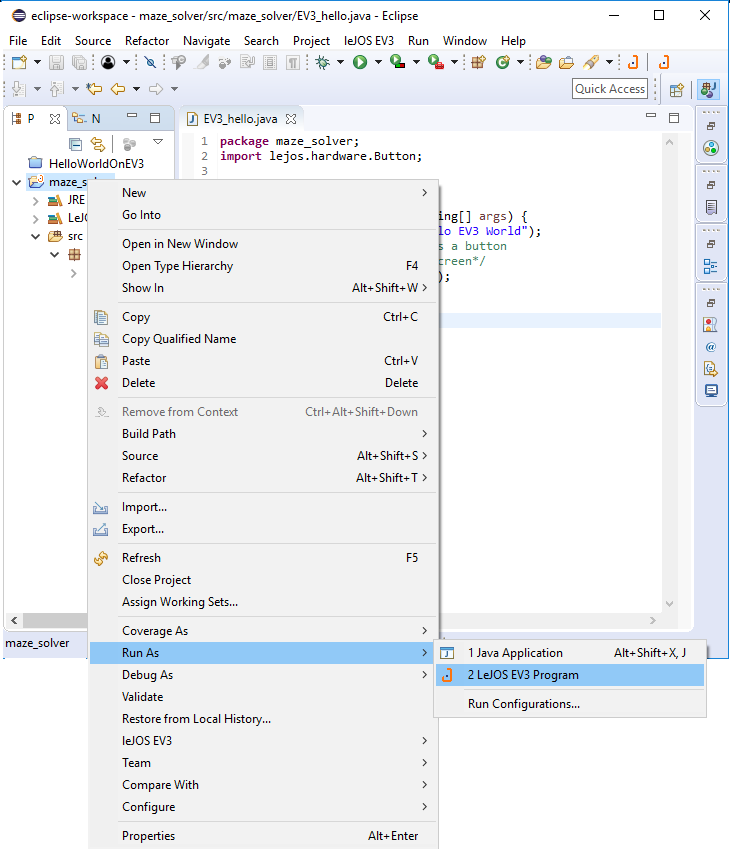
6. Run as LeJOS EV3 Programm
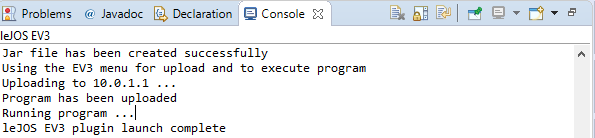
7. Your console output should look like this and the EV3 shoul print "Hello EV3 World" on the screen